It’s hard to believe that 2 years have gone by since the time I started this blog. Sometimes it feels like I’ve been blogging forever and other times I feel like a newbie. Irrespective, I’ve had an awesome time here; learning new things and meeting new people has been very enriching (at the risk of sounding overtly formal).
Just to track progress, some changes that I’ve noticed…
- Starting from a blue Thisaway theme (should have captured a screenshot, for keepsake) theme to this customised blog design, I love tweaking the blog layout.
- My cookbook collection that has grown from 2-3 books to 50 odd (and still counting).
- I find myself moving away from cooking and falling more and more in love with baking with each passing post.
- Better photographs!
- And pretty much everything from my 1st blog anniversary post still stands.
Whether you’ve read the blog since the time I started, or hopped on this delicious journey a few months ago, or have just been around for the last 30 seconds – thank you! Thank you for reading. Thank you for your comments. Thank you for your e-mails. Thank you for your tweets. It really means the world to me.
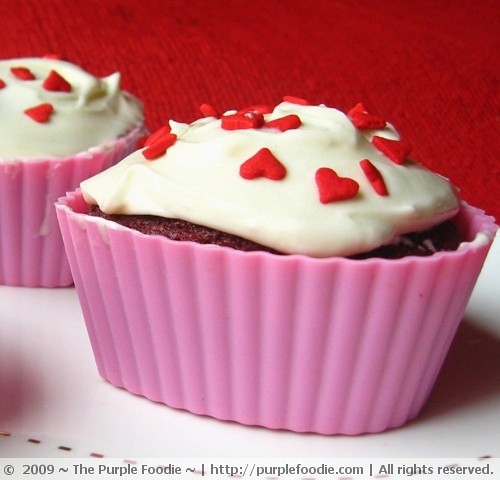
The cupcakes are just wonderful – red (of course!) and soft and moist. And the cream cheese icing is to die for! I couldn’t stop licking it as I waited for the cupcakes to cool. I was reminded of the first time I tried a very American red velvet cupcake at Magnolia bakery. I’m sure they originated in some fairytale. The recipe is from the Hummingbird Bakery Cookbook, so I think I can’t stop extolling the recipe right about now.
Adapted from: The Hummingbird Bakery Cookbook
Yield: 12 cupcakes. Double the recipe for 2 9 inch layer cakes.Reference: There is a really helpful red velvet cupcake comparison on The Way The Cookie Crumbles. Also, please make sure you either use the cup measurement or the metric measurement. Don’t swing in between! Like most red velvet cucpakes, this recipe calls for vinegar, but I didn’t use it. Instead, i doubled the amount of baking soda required.
4 Tablespoons / 60g. butter, at room temperature
¾ cup / 150g. sugar
1 egg
2 1/2 / 10g. Tablespoons unsweetened cocoa powder
1 tbsp / 20ml. red food coloring
1/2 teaspoon vanilla extract
1/2 cup / 120ml. buttermilk or well beaten yoghurt
1 cup plus 2 Tablespoons all-purpose flour
1/2 teaspoon salt (if you’re using unsalted butter)
1 tsp teaspoon baking soda
Method:
- Preheat the oven to 170°C/350°F.
- In a bowl, whisk together the flour and baking soda.
- In another bowl, beat butter and the sugar on medium speed until light and fluffy and well mixed.
- Turn the mixer up to high speed, slowly add the egg and beat until everything is well incorporated.
- In a separate bowl, mix together the cocoa powder, red food colouring and vanilla extract to make a very thick, dark paste. Add to the butter mixture and mix thoroughly until evenly combined and coloured (scrape any unmixed ingredients from the side of the bowl with a rubber spatula).
- Turn the mixer up to slow speed, add a third of the flour mixture, then half the buttermilk, a third of the flour, half the buttermilk, and ending with the rest of the flour. You can fold in the last third of flour by hand.
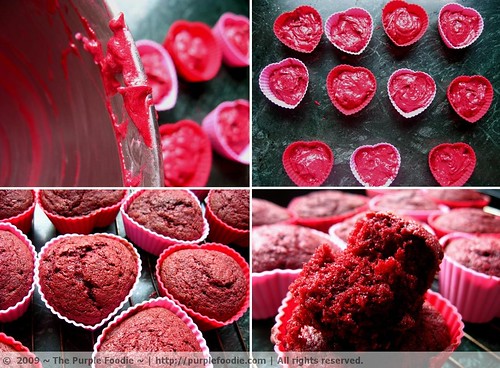
- Spoon mixture into cupcake mould line with paper or into silicone moulds.
- Bake for about 20-25 mins or until a toothpick inserted into the cake comes out clean.
- Let cool completely before frosting the cakes.
Cream Cheese Frosting
( double recipe to frost a 2 layer 9-inch cake)
Method:
- Beat the powdered sugar and butter together in the bowl of a stand mixer fit with a paddle attachment. Mix on medium-slow speed until it comes together and is well mixed. Mine kinda looked crumbly.
- Add the cream cheese all at once and beat on medium to medium-high until incorporated.
- Turn the mixer to medium-high and beat for 5 minutes, or until the frosting becomes light and fluffy. Be careful not to over beat or the icing might get runny.


