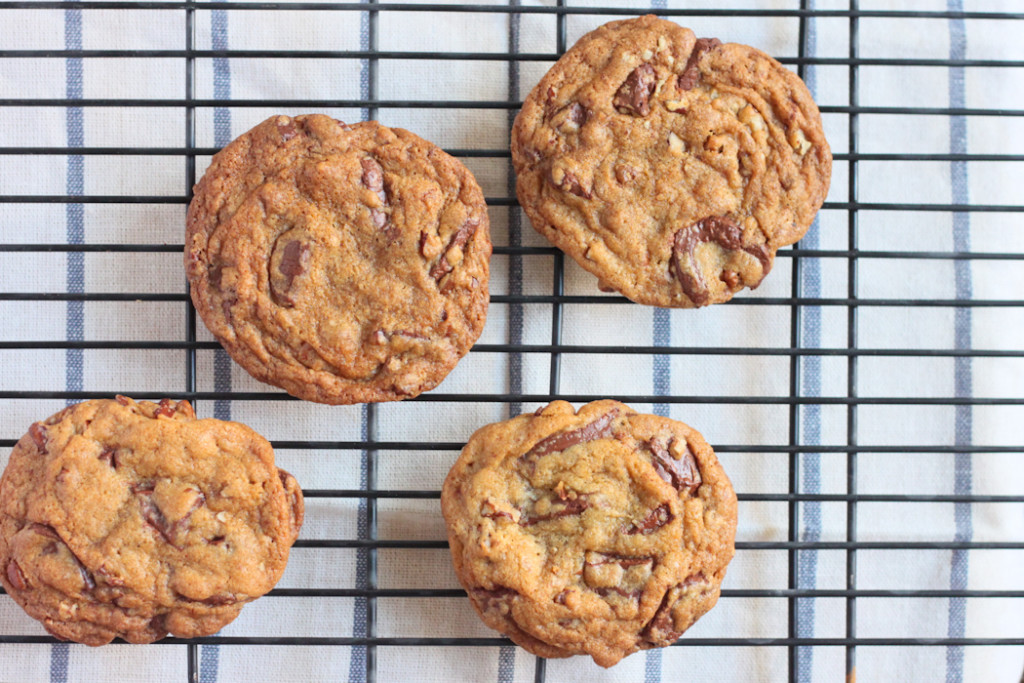
From the category archives:

chocolate

Chocolate Stuffed Chocolate Cookies

I go through cookie phases. I don’t make them for months at a stretch, but when I do, I can’t seem to stop.

With cookies showing up all over the blogosphere this season, I got sucked into the madness as well. First, it was the walnut-rosemary that sat in a cookie tin on my desk. And now, these chocolate stuffed cookies.

It’s a simple cookie dough that you roll out and then stuff with really good chocolate. Stuff them well. Stuff them so that the cookie dough barely encloses it. And then bake them. A good 9-10 minutes later you’ll have warm, cookies oozing with melted chocolate.

Have them warm, pinching them a bit so that the chocolate squirts out. It’s fun.

What’s your current favorite cookie recipe?

Chocolate Stuffed Cookies

Makes 20 cookies

Ingredients:
75g butter
75g sugar
1 tsp vanilla extract
1 egg yolk
120g flour
1 tsp baking powder
1 tbsp cocoa powder
1 tbsp milk (or just enough to moisten the dough a bit)
Chocolate callets or chopped chocolate for stuffing the cookies

Equipment: Silicone mat (USA | UK)

  1. Preheat the oven to 170C/350F and line a baking sheet with parchment paper or a silicone mat.
  2. In a bowl, beat the butter and sugar together until pale and creamy. Add the vanilla extract followed by the egg yolk and continue to beat until light ad fluffy.
  3. Sift together the flour, baking powder and cocoa together before folding into the butter mixture.
  4. The dough will be dry and crumbly – it’s supposed to be this way. Add a tablespoon or so of water if you think it’s absolutely necessary.. else wrap the dough in cling film and let it rest in the refrigerator for 30 minutes.
  5. Next, roll our the dough and then cut out circles of diameter 1.5 inches. Place the chocolate (as much as you can fit) and gather together the sides to enclose the chocolate.
  6. Place on the cookie sheet and bake for 9-11 minutes.
  7. Remove on a cooling rack… eat up. Great dunked in cold milk as well.

{ 32 comments }

Hot Chocolate Heaven

November 23, 2011

Hot Chocolate at Angelina

A little while ago, I had hot chocolate at the famed Angelina in Paris. It was the most expensive hot chocolate of my life at €7.20. Served in a pitcher with a small pot of whipped cream, the hot chocolate is what dreams are made of.

The hot chocolate at Angelina (L’Africain) is rich and smooth, and what I really appreciated: served at just the right temperature. If it were any thicker, it’d be melted chocolate. The marble topped tables, the Rococo interiors, the immaculately dressed waitresses, the flashlights on every other table (people recording one of their most important days in Paris) make the Angelina experience a memorable one. And while you’re at it, an order of Mont Blanc won’t hurt.

Hot Chocolate

I can’t afford to drink hot chocolate at Angelina everyday, so I began making my version of rich hot chocolate every time the craving stuck (which is often, now that it’s getting cold and grey). It’s thick, dark and wonderfully creamy. Like all things sinful, it’s best to use the richest milk and cream. I even indulged with an inch of vanilla in the milk. Use chocolate that’s upwards of 55%. I didn’t add any sugar, but you might want to sweeten it a bit if you’re using 70% chocolate. The key here is to be liberal with all the ingredients, and then once ready, serve them in the prettiest cups you own.

Hot Chocolate

Thick and Velvety Hot Chocolate Recipe

Prep Time: 2 minutes

Cook Time: 5 minutes

Total Time: 7 minutes

Yield: 2

Ingredients

  • 200ml / 1 cup milk
  • 100ml / 1/2 cup cream
  • 1 inch vanilla, split and scraped (optional)
  • 100g the best chocolate you can get 55% upwards (I've used 70% callebaut and 50 something Valrhona)
  • whipped cream to serve

Cooking Directions

  1. Heat the milk and cream together in a pan with the vanilla. Once it comes to a simmer, turn off the heat and cover the pot for the vanilla to infuse into the milk. Let it sit for 20 minutes or so.
  2. Reheat the milk to bring it back to a simmer. Take it off the heat and whisk in the chocolate and stir until the chocolate has completely melted.
  3. Pour into cups and serve with whipped cream.

Hot Chocolate

{ 34 comments }

Nutella Cake

October 12, 2011

Nutella Cake

I have three huge bottles of Nutella sitting on my shelf. My mom would be furious if she knew; but then, that’s my excuse for not making unnecessary trips to the supermarket.

After having my fill of Nutella slathered on toast and straight from the jar, I decided I’d bake some of it into a cake. A dense, moist cake that is speckled with tiny bits of roasted hazelnuts. Nutella cake. I used the recipe from How to Be a Domestic Goddess except that I didn’t add any Frangelico – I wish I had some of my hazelnut extract to add to the silky cake batter. Also, what I also did was top the cake with Nutella instead of ganache and sprinkled it with caramelised hazelnuts instead of plain toasted ones. On second thought, I should have added some finely crushed caramelized hazelnuts into the cake batter too.

This is probably the third cake I’ve baked in my new oven, and I’m still getting used to it. Luckily I have an oven thermometer sitting inside all the time so I can calibrate it based on the readings, because for some reason this oven runs way hotter than the indicated temperature. The nifty equipment’s such a saviour. I’m also becoming pretty good at whipping up egg whites to stiff peaks with a giant whisk. Earlier, I never bothered adding salt, but I noticed that the whites get whipped up quicker with a pinch added in. The salt, apparently, acts as a fantastic stabiliser.

All in all, this recipe’s a keeper. (And it’s gluten free!) Do you have any favourite Nutella recipes for me to put my jars to use?

Nutella Cake Recipe

Serves: 8

Adapted from: How to be a Domestic Goddess (USA | UK | India)

Ingredients:

  • 6 large eggs, separated
  • Pinch of salt
  • 125g soft unsalted butter
  • 400g Nutella (1 large jar)
  • 1 tablespoon Frangelico, rum or water
  • 100g toasted hazelnuts, ground
  • 100g dark chocolate, melted
  • For the icing:
  • 4 tbsp Nutella
  • caramelised hazelnuts [100g toasted hazelnuts +100g caster sugar]
  • Equipment: 23cm/9 inch Springform tin, greased and lined with parchment

  1. Preheat the oven to 180ºC/350ºF. In a large bowl, whisk the egg whites and salt until stiff. In a separate bowl, beat the butter and Nutella together, egg yolks and ground toasted hazelnuts.
  2. Stir in the cooled, melted chocolate, then fold in the egg whites gently, a third at a time.
  3. Pour into the prepared tin and cook for 40 minutes or until the cake’s beginning to come away at the sides, then let cool on a rack.
  4. For the caramelized hazelnut nuts: Chop the hazelnuts coarsely. In a pan, melt the sugar until it turns amber. Toss the hazelnuts in, making sure they are evenly coasted and then transfer to a silicone baking mat or a lightly oiled baking sheet. Cool. Chop to separate the nuts.
  5. Spread the top of the cake with Nutella. Scatter the caramelized hazelnuts on top of it.

{ 32 comments }

Gianduja Roulade

March 25, 2011

Gianduja Roulade

That’s just fancy talk for rich hazelnut chocolate ganache rolled into a hazelnut sheet cake rich with chocolate and more hazelnuts.

As you’ve probably noticed, there is a lot of chocolate being eaten in the Purple Foodie household. And this time, with a bag of fresh hazelnuts at hand, I had to put together one of the world’s greatest food pairings: chocolate + hazelnut.

I made the hazelnut ganache from scratch – which means I toasted the hazelnuts, ground it to a paste, and then mixed it with dark chocolate and cream. If the cake didn’t bake in 8 minutes, I’m pretty sure I’d have licked the bowl of ganache clean.

If you’re not particularly inclined on making the ganache from scratch, you could make the ganache with Nutella. Will work just as well.

Gianduja Roulade Recipe

Adapted from: Pure Dessert (USA | UK | India)
Equipment: A 12×16 inch or 11×17 inch baking sheets with rimmed edges, or two 9×9 inch baking pans, or jelly roll pans.

Gianduja Ganache

Ingredients

  • 4 oz / 100g hazelnuts, toasted
  • 4 oz / 100g dark chocolate
  • 4 oz / 100g icing sugar
  • 8 oz / 200g light cream (I use 25% fat)

Cooking Directions

  1. Toast the hazelnuts in at 175°C/350°F, until they are fragrant and light brown. Let them cool a little before transferring it to a mixer for grind to a paste starting with half the sugar, and then adding the rest of the sugar until it's a homogenous paste. Transfer this paste to a bowl and then add the chocolate. In a saucepan, bring the cream to a boil and pour it over the chocolate-hazelnut mixture. Stir till all the chocolate has melted and then refrigerate until ready to do.

Hazelnut Cake

Cook Time: 8 minutes

Total Time: 1 hour

Ingredients

  • 1.5 oz / 50g hazelnuts, toasted
  • 2 tbsp flour
  • 6 oz/ 180g dark chocolate
  • 4 oz/ 100g butter
  • 4 eggs, seperated
  • 2/3rd cup / 130g caster sugar
  • cocoa powder, for dusting

Cooking Directions

  1. Preheat the oven to 175°C/350°F.
  2. Pulse the nuts with the flour in a food processor until finely ground. Set aside.
  3. In a large bowl, melt the chocolate and butter over a pot of simmering water. Once melted, remove from heat and then stir in the egg yolks and half the sugar (1/3rd cup).
  4. In another bowl whip the egg whites until soft peaks form. Then slowly add the remaining sugar, and beat until stiff peaks form.
  5. Fold in about a 1/4th of the whites into the egg mixture. Then scrape all of the egg mixture into the bowl, sprinkle with the flour and hazelnut mixture and fold it in.
  6. Spread the batter evenly into prepared pans. I preferred making mine into smaller roulades, so I divided the batter into two 9 inch square pans.
  7. Bake for 8-10 minutes, until a skewer comes out clean.Now, finally when the cake has cooled, invert it on a sheet of foil and then spread it with the gianduja paste. Start rolling it with the help of the foil. There will be cracks, but it gets less severe as it thickens to one cake.
  8. Refrigerate for a while before slicing, to have neat slices. Dust with cocoa powder to serve.

{ 10 comments }

Chocolate Brownie

March 2, 2011

Chocolate Brownies
Rich. Chocolate. Brownies.

I bet you’re smiling already.

I haven’t met a person who didn’t get happy at the very thought of brownies. You don’t need me to tell you that they’re made with dark chocolate, heaps of cocoa, and are supremely addictive. Just the fact that they’re brownies gives them a ticket to your bookmark folder.

These brownies are Nigel Slater’s rather modestly titled ‘My Very Good Chocolate Brownies’ from his book the Kitchen Diaries. I’ve had this book for a while, but didn’t bake from it until today. Every time I pulled it out, I’d get distracted by his conversational commentary, and the baking took a backseat. These also popularly known as 24-carat brownies, simply because there are no nuts or flavourings of any kind, just pure muddy brownies.

Chocolate Brownies

My verdict: I’d expected a shiny crust, but I didn’t get that, and they left me greasy-fingered, but not in a bad way. They taste even better after a day. But then, I think that all brownies do. Gooey, with a brittle crust, they are rather dark with all that cocoa powder.

I do love the brownies from Baked, but I think my brownie preference is changing. I can’t decide if I like the gooey kind or the cakey kind. Not the kind that’s cakey, dry, and rubbery with a million air pockets like the kind you get in most pastry shops in the city, just the kind that is cakey owing to being lighter in texture. Maybe you can help me by pointing me to your favourite brownie recipe?

Chocolate Brownies

Muddy Chocolate Brownie Recipe

Adapted from: Kitchen Diaries, Nigel Slater (USA | UK | India)
Yield: 16 big pieces.

Ingredients:

200g dark chocolate
60g flour
60g cocoa powder
½ tsp baking powder
250g butter
300g caster sugar
3 eggs + 1 egg yolk

Equipment:
9 inch/23cm square baking tin

Method:

  1. Preheat the oven to 180C/350F. Line the baking tray with parchment.
  2. In a small bowl, melt the chocolate over simmering water. Set aside.
  3. Sift the flour, cocoa powder and baking powder together. Set aside.
  4. In a bowl, mix the butter and sugar together until light and fluffy, then add the eggs.
  5. Stir in the melted chocolate until thoroughly incorporated, and then finally, fold in the flour, making sure that you don’t over mix the batter.
  6. Pour it into the pan, and bake for 20-25 minutes. Test with a skewer- it should come out sticky with brownie clumped up in places, and not look like smooth, raw batter. If still underdone, switch off the oven, and pop it back in for another five minutes. Anything more than that will ruin it, because brownies continue to cook in all that trapped heat even after they’re pulled out of the oven.
  7. Let it cool for at least an hour to get well defined pieces, or dive in with your spoon if patience isn’t one of your strongest points.

{ 34 comments }